|
|
| Line 153: |
Line 153: |
| | 1. Click <u>Upload file</u> in the toolbox on the left. | | 1. Click <u>Upload file</u> in the toolbox on the left. |
| | | | |
| − | [[Image:Upload_file.JPG]] | + | [[Image:Upload file.JPG]] |
| | | | |
| − | [[Image:Upload file.JPG]] <u></u> | + | |
| | | | |
| | <br> | | <br> |
Revision as of 13:24, 29 March 2011
Create a new Article
There are two ways to create new articles:
Option 1
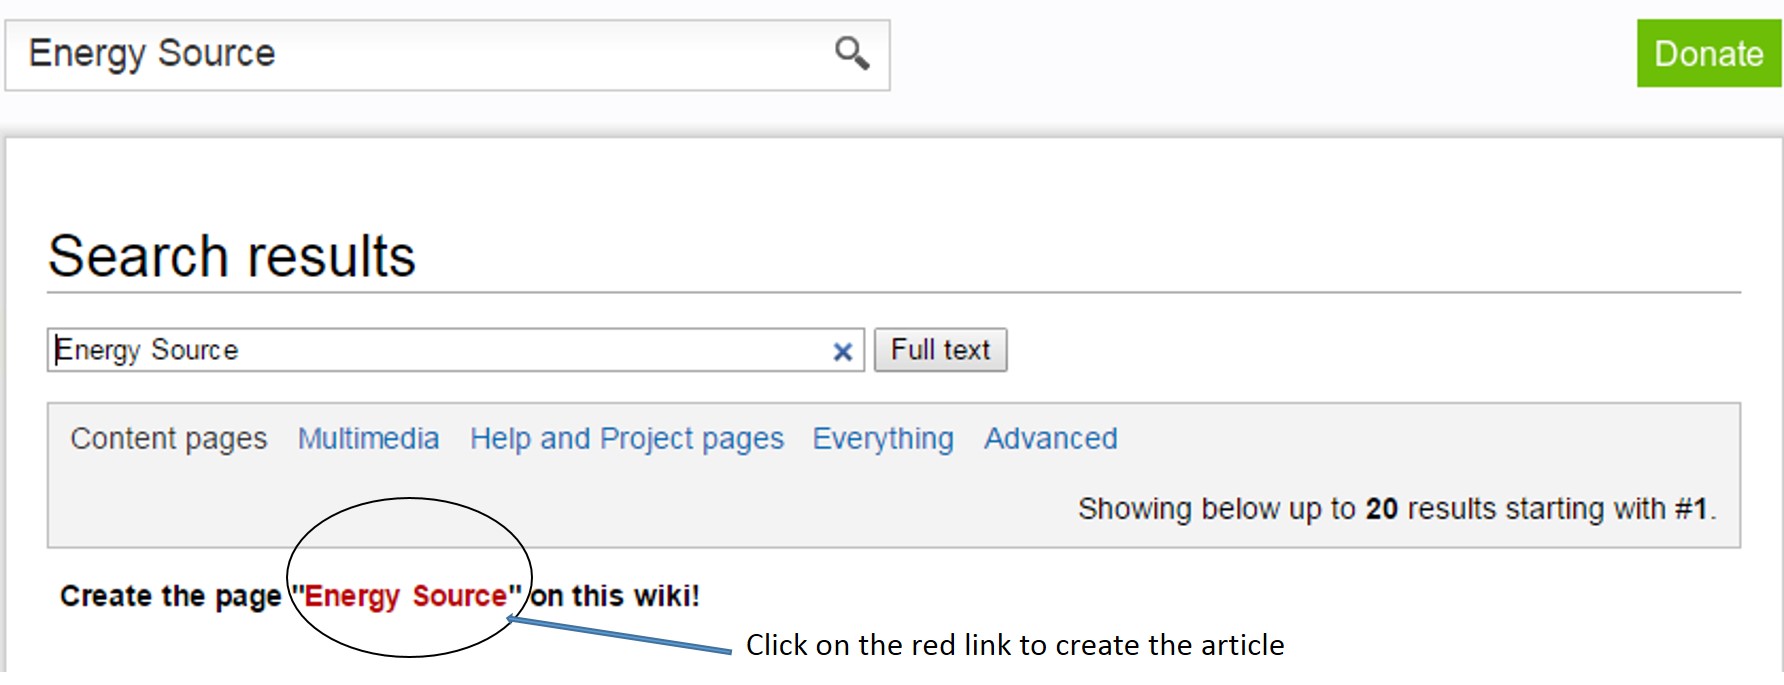
1. To create a new article enter the preferred title in the search panel and confirm with Go.

If it does not exist yet, click "Create the page" to do so.
2. You will be lead to the editor of your new article. Enter your text and be sure to click the safe button when finished.
Option 2
1. Within an article, highlight the word(s) that will build the later link and click the Edit/Insert Link symbol in the toolbar.
File:Link a word.JPG
2. A dialog window appears. Type in the desired name of the new article into the panel ”Link”. Click OK and the link will be displayed in red. If you click on that red link, wou will be lead to your new article´s editor that is ready to be created.
To ensure a consitant layout of all articels there is only a limited number of fonts available.
Copy Formatted Text from Word
File:Best results.JPG
1. Copy the text from your word document (Strg + c).
2. Open the respective wiki page and its editor (see "Edit Articles"). Put the cursor where the text shall be copied to.

3. Click the Paste symbol in the toolbar.

4. Copy your text into the textbox and confirm with OK.

Saving text as draft
1. If you want to save a text as a draft, mark it, then click the format´s roll-out symbol and chose "draft" ("Entwurf").
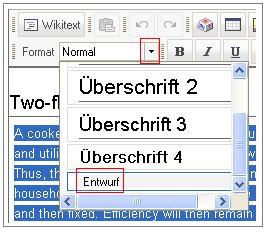
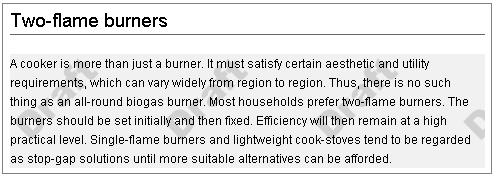
2. The text will than appear with a light grey background.
Add Headlines
1. Highlight the words to create a headline.

2. Click the format’s roll-out symbol in the toolbar and choose the desired headline format.
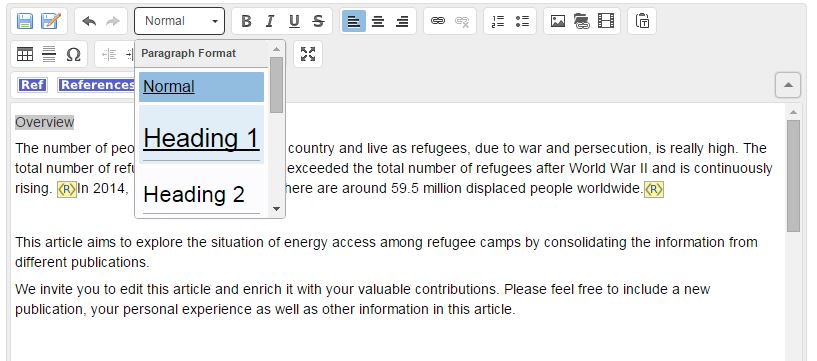
3. The headline appears underlined and in a predefined height. Heading 1 is the largest, Heading 6 the smallest format.

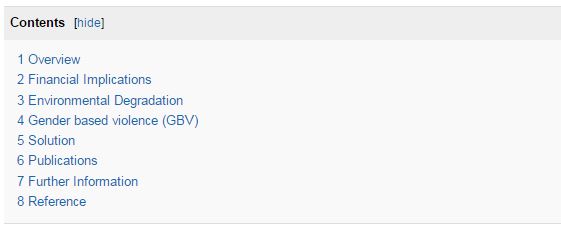
4. If there are four headlines or more, an automatically generated table of contents (TOC) will be shown after
the introducing passage of the article. Smaller Headlines (e.g. headline 3) will appear as subitems in the list. If you want to force the TOC to be always shown regardless of the number of headlines, you can put the magic keyword __FORCETOC__ anywhere on the page and a TOC will always be shown. Conversely, the magic keyword __NOTOC__ will suppress the TOC if placed anywhere within the page contents.
Create Bullet Points and Numbered Lists
1. Click Numbered List or Bulleted List at the preferred position of the article.

2. An indented number (enumeration sign) appears. Simply enter your text here.
To create a new bullet point press enter at the end of the paragraph.
Numbered list

Bulleted list

To remove a bullet point click the respective line, then click the bullet point symbol again.
Uploading Pictures and Documents

You can upload pictures, pdfs etc to the gallery in order to copy them into an article.
Important: If you are editing an article save your current changes as they will get lost in the next step. (Save page, see Compose Articles step 7).
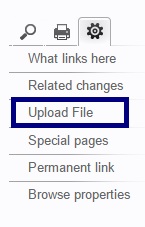
1. Click Upload file in the toolbox on the left.
2. Enter the file´s name or click browse to find it.
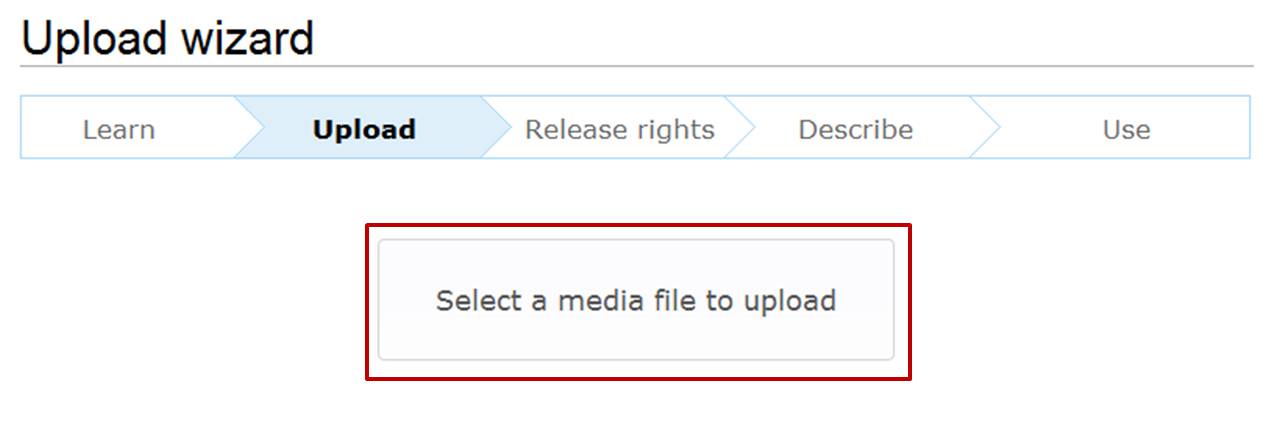
3. The file browser allows you to choose a file from your computer. Highlight the respective file and click “Open” (Öffnen).
The file will be listed in the panel Source filename automatically.
Choose file.JPG
4. Click Upload file.
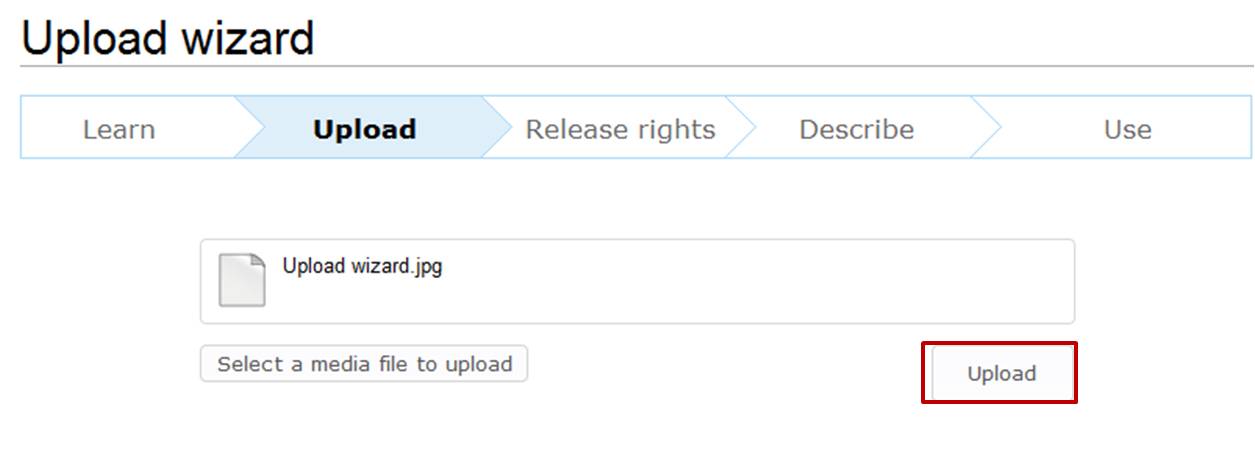
5. The uploaded file can now be put into any article: Open the article and click Edit.
To insert a picture/pdf as picture preview, see Insert file as picture/preview
To insert a link to a picture/pdf/word-document, see Insert file as link
Another way to upload files:
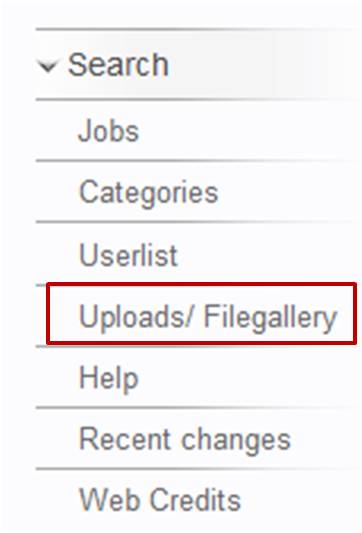
1. Click Uploads/Galleryin the upper toolbar.
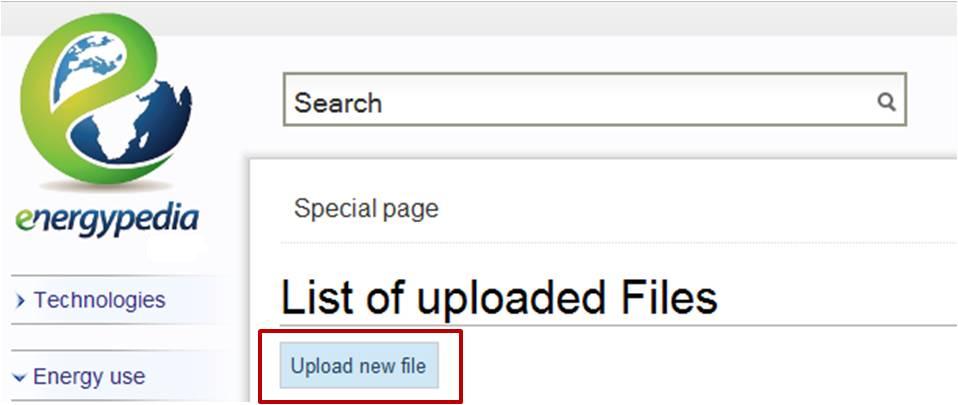
2. Then click on Upload new file.
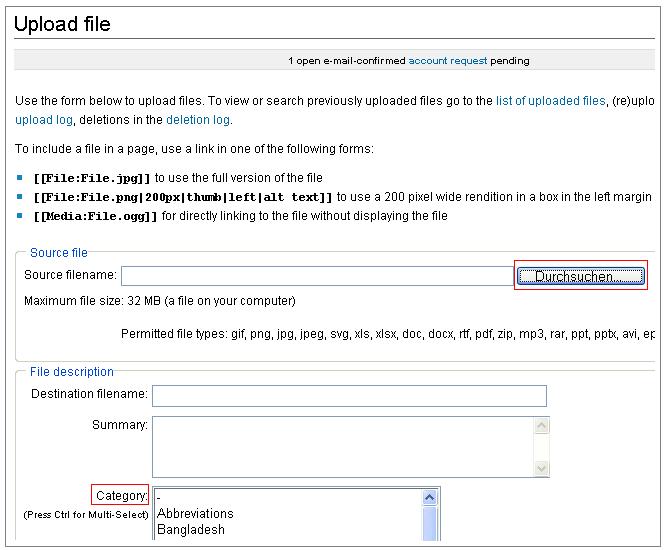
3. Click "Search" (Durchsuchen) to select the document you want to upload.
With "Category" you can categorize your document.
4. Then "upload" the document.

5. After the document is uploaded you´ll find it under "File history". Alternatively, click the "Insert/Edit Document Link" to search for the document.
File:File history.JPG
Insert File as Picture
1. Mark the line where the file shall appear. Click the symbol Insert/Edit Image in the upper toolbar.

2. Enter the file´s name or its first few letters into the search box and choose the correct one from the list.
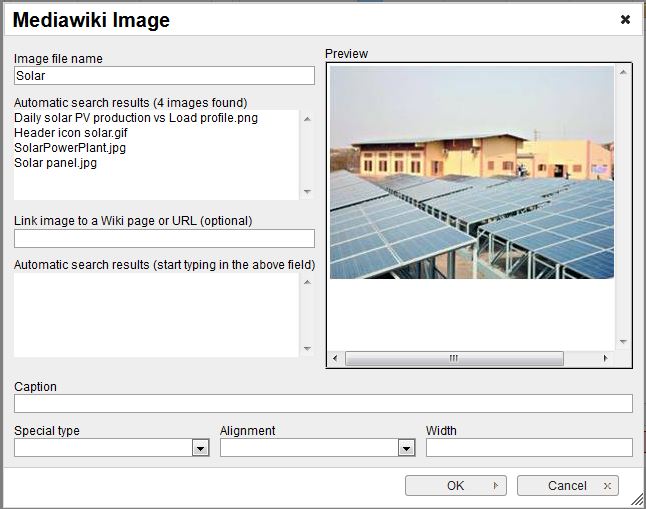
3. The option Align provides the opportunity to put the graph right, left or in centre of line.
4. Text entered in the panel “Caption” will be shown when you move the mouse cursor over the graph.
5. Confirm with OK. The graph will appear in the edited text.
6. To change a file´s height, alignment, mouseovertext or filename click on it with the right mouse button and choose Image Properties. Important: Previously save your current changes with “Save page” (see Compose Article step 7).
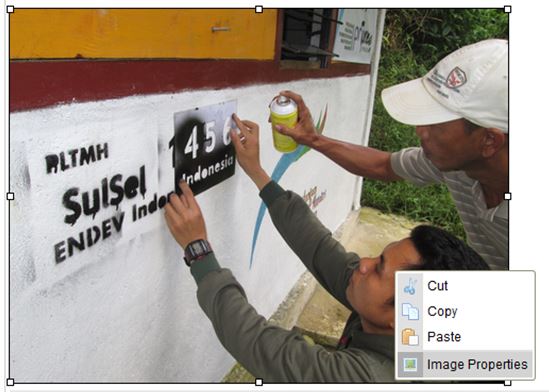
7. If a popup blocker is activated a message box and an information panel will appear. On the upper side of the screen click on the information panel and choose the option “temporarily enable popups” (see Compose Articles step 3). Afterwards confirm with OK.
Now change the properties in the emerging dialog “Image Properties“ (see Insert Graphs step 7).
To remove a graph from the article highlight it in the text editor and press del.
Insert Footnotes and References
- Type “References” at the bottom of the article and choose “Headline 1”
- Make sure the curser is underneath the line

- Click on references in the toolbar
File:References1.jpg
- At the point of citation in the article, enter the footnote or reference tag
File:References2.jpg
- Enter the footnote or reference like this
File:ReferenceProperties.jpg
- To cite the same reference or footnote several times, identify it by using the same reference name File:ReferenceProperties4.jpg
Linking Footnotes and References
In order to link a footnote, you need to have uploaded the document you want to link
1. Click on edit
File:Edit button.JPG
2. Click on wiki-text
File:700px-Wikitext einfügen.JPG
3. Search the reference you want to link
File:Linking Footnotes.jpg
4. Add
File:Linking Footnotes1.jpg
5. Click on Save
