File:Save changes.JPG
1. To insert a table open the article and click Edit (see Edit Articles). Navigate the cursor to the preferred line.
2. Click the symbol Insert/Edit Table in the toolbar.
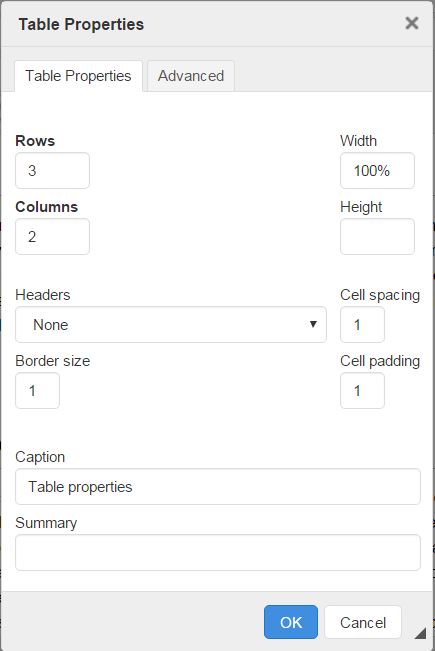
File:Insert table.JPG
Note: if a popup blocker is activated a message box and an information panel will appear. Click on the information panel on the upper side of the screen and choose the option “temporarily enable popups” and confirm with OK.
3. Choose your desired table properties by entering the number of rows (Rows) and columns (Columns) you need.
4. The panel “Border size“ allows you to specify the strength of the table gridlines in pixels. “0“ hides the grid.
5. Click Alignment (Ausrichtung) to choose where to align the table (right, left or in centre of line).
6. You can enter a title in the caption field that will be shown on top of the table. Confirm with OK.
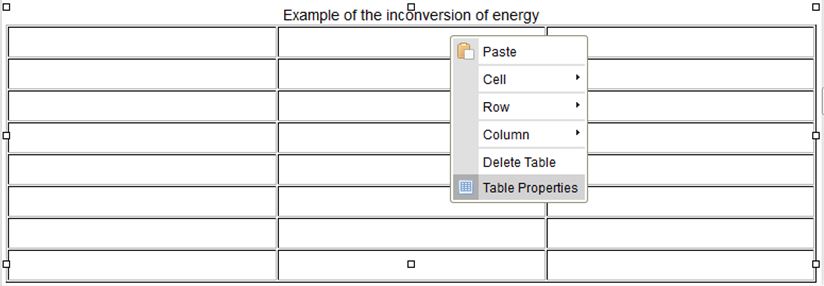
 -> File:Tabelle beispiel.JPG
7. To alter the table click the cell with right mouse button to get a context menu.
8. For example, you can choose Merge Right (or left) to merge two cells to one.
 File:Tabelle merge right 1.JPGFile:Tabelle gemerged 1.JPG
Other possibilities: delete or insert cells, rows and columns etc.
9. To change basic table properties like the strength of gridlines, height, width and alignment click the table’s gridline with the right mouse button. In the context menu choose “Table properties“.
Tabellen eigenschaften.JPG -> 
Sortable Tables
The Wiki platform also allows the useful feature of sortable tables. In order to create a sortable table follow two steps: Firstly, create a table as mentioned above in the general instructions.Secondly, replace the entire top row using the Wikitext editing mode with the following command:
[ {| class="wikitable sortable FCK__ShowTableBorders" ] (Without the square brackets)
This will result in buttons next to the headings in the top row that sort the entire table alphabetically from A-Z (if pressed once) and from Z-A (if pressed twice).